
Below are instructions on how to configure your McPi Raspberry Pi case power switch.
The Raspberry Pi, the $35 mini linux computer rocked the computing world on a small scale but in a big way. They ended up being way more popular than even Ebon Upton imagined. This allowed them to improve the performance and increase the feature count dramatically. Current Pi3s are 10X the practical speed of the 1st gen boards. Wow.
I was an early adopter of the Pi. Years ago Donour Sizemore and I designed a motorsports scale system that incorporated four Pi model Bs. These were great except when power was abruptly removed they were not gentle on SD cards . Shame. Our fix was to implement a button on the HMI panel that allowed for easy shutdown and make the file system read only.

The Motorsports Switch Fix
From experience, we can assure you having a user friendly power switch is a necessity on the Pi. That said, Why not use the best looking and highest performance switch available? Our case includes a waterproof stainless steel momentary switch with blue LED ring indicator.
Now that we have a switch, we need some user feedback to indicate if the pi is operating or not. The indicator output is a bit of a hack but works beautifully. We simply enable the serial port to determine whether the Pi is active. When active, it provides a 3V signal an illuminates the blue LED ring light.
See below for the raspbian modifications to make the power switch and indicator operate properly.
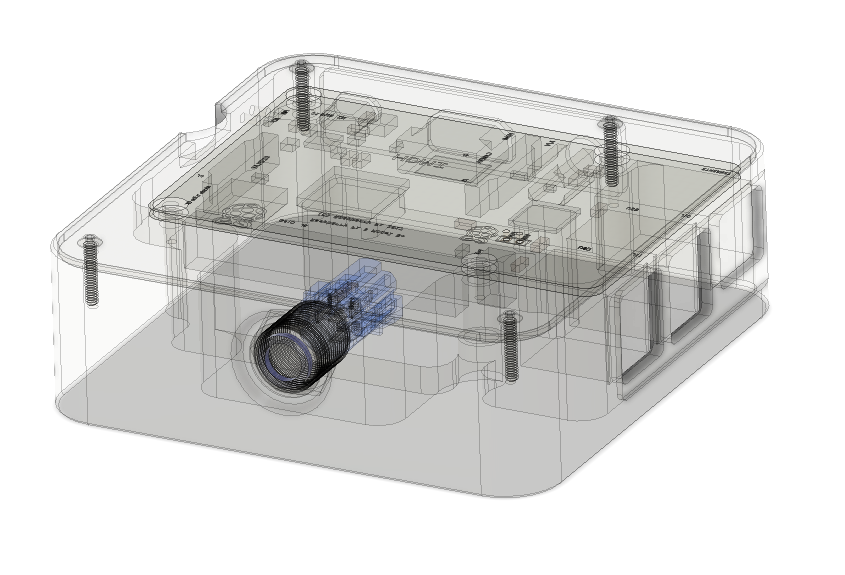
Please note that on the Pi3b+ this is not a total power shutdown. The processor does halt and power consumption is decreased dramatically, down to approximately 90ma. The red power led does remain on the main board. The onboard LEDs can be seen through the two ports on the side of the case. Note that clear PETG filament makes a great light pipe!
Press the button again and the pi will wake from power down. Reboot and you are good to go after the normal boot process. EZ as pi!
Code
Edit /boot/config.txt
sudo nano /boot/config.txt
Add these lines at the bottom:
#Added below for the MACSBOOST.com McPi Raspberry pi case soft shutdown and start blue ring led switch.
#https://www.macsboost.com/2019/01/24/mcpi-carbon-fiber-aluminum-racing-raspberry-pi-case
dtoverlay=gpio-shutdown
enable_uart=1
You can easily edit the config.txt on a pc. Insert the SD card on a PC. You will see a folder with the config.txt in it. Just edit the file, place the SD card back in the pi and hit the gas!
Wiring loom
Attach the switch wires (blue) to header pin 5 and pin 6.
Attach the LED wires (white) to header pin 8 and pin 9. Polarity does not matter.

[…] https://www.macsboost.com/2019/01/24/how-to-configure-your-mcpi-raspberry-pi-case-power-switch/ […]